|
Important note for Office 365 subscriptions: Since February 28, 2017, Office 365 subscribers can no longer download and install Office 2013 as part of an Office 365 subscription. For more details, see Office 2013 is no longer available for installation with an Office 365 subscription. To ensure the security of the Office suite in a Office 365 subscription and to get all of the latest features, subscribers should upgrade to Office 2016 for free as part of their subscription. Note: This announcement doesn't affect one-time purchases of Office 2013 such as, Office Home and Student, Office Home and Business, or Office Professional. Information for how to install those versions of Office are available in the step-by step instructions below. |
Install or reinstall Office Home and Student 2013, Office Home and Business 2013, or Office Professional 2013
Tip: For steps to install the latest version of Office that came with Office 365, or for a single, one-time purchase of Office 2016, go to Download and install or reinstall Office 365 or Office 2016 on your PC or Mac.
For one-time purchases of Office 2013 you can install Office on only one computer. However, you may transfer Office 2013 to another computer that belongs to you if you experience a hardware failure or you buy a new computer. For more information, see the Microsoft License Terms for your product, or see this blog post, Office 2013 now transferable.
Step 1: Sign in to My Office Account to begin installing Office 2013
-
Go to My Office Account. If you're not already signed in with the Microsoft account associated with your copy of Office do that now. If you're signed in with a different account, sign out of that and then sign in again with the correct Microsoft account.
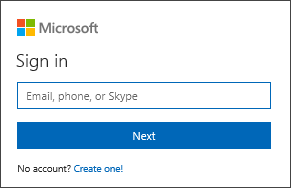
Tip: If your sign in was unsuccessful try signing in again with the correct account, or see "This is the right place to install and re-install Office" for a list of options, including what to try if you can't remember your Microsoft account.
-
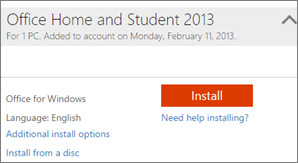
In the Install Information section, select Install. This begins the process to install the 32-bit version of Office on your PC using the language you selected when you redeemed the product.
If you'd like to install the 64-bit version instead, choose Additional install options > Office (64-bit), and then select Install. If you're not sure which version you should install, see Choose the 32-bit or 64-bit version of Office.
Tip: If you're interested in other languages for Office 2013, see Office 2013 Language Options.
Step 2: Install and activate Office
-
Depending on your browser, click Run (in Edge or Internet Explorer), Setup (in Chrome), or Save File (in Firefox).
-
When you see "You're good to go", choose All done.

-
Start using an Office application right away by opening any app such as Word or Excel. In most cases, Office is activated once you start an application and after you click Accept to agree to the Microsoft Office License Agreement.
Tip: If you completed the installation and you can’t find the Office applications on your computer, see How to find the Office applications.
-
Office might activate automatically when you open an app, such as Word, for the first time. If it doesn't and you see the Microsoft Office Activation Wizard, follow the prompts to activate Office. If you need help with activation, see Activate Office 365, Office 2016, or Office 2013.